How to Migrate to the New Sparkle Updater XPC Branch
This is the first post in a series:
- How to migrate to the new Sparkle XPC branch (this post)
- How to toggle use of XPC service (Spoiler: you don’t have to do anything but bundle the XPC services in your app)
- How to build, embed, and notarize the XPC services in your app
The standard solution to provide app updates outside the Mac App Store is to use the amazing Sparkle framework.
The releases of Sparkle don’t support sandboxed applications well, though, so the core maintainer Kornel Lesiński (@kornelski) is working on a more secure fork of Sparkle next to the existing one. He’s maintaining the regular Sparkle, and the fork. The fork features various XPC services to deal with Gatekeeper security configurations and Sandbox entitlements in a proper way. (I have to phrase it in such a vague way because I have no clue about the details, yet. Explanations are very welcome in the comments!)
The future of Sparkle is in a combination of the new XPC branch with the latest additions to the core branch, like EdDSA. But the future of Sparkle 2.0 is the XPC-based refactoring.
So how do you switch from regular Sparkle 1.x to the ui-separation-and-xpc branch if you want to familiarize yourself with the new project layout and types?
- Switch to the new project,
- migrate existing code to use new classes,
- use the XPC services where appropriate.
I want to cover steps (1) and (2) here. I’m still figuring out (3).
You do not have to use the XPC services. Even though the docs currently state that this is optional, I find it hard to really figure out what’s going on. That’s why I’m writing about all this: to expand the available corpus of information.
So when we focus on steps (1) and (2), all we really do is migrate to the new types; we will still be using the Sparkle.framework build product like before, and that’s it. Nothing more to achieve today.
Checkout the new branch
Carthage and CocoaPods currently don’t work with the new branch’s framework if you want to build the various XPC services.
They do work if all you want is the updated Sparkle.framework. In that case, go to the next step.
You could download the repo content manually to experiment with the new stuff. For a more useful integration, we’re going to use a git submodule, though, to be able to pull changes easily.
$ cd /path/to/your/xcode-project
$ mkdir -p ./Extern
$ cd ./Extern/
$ git submodule add -b ui-separation-and-xpc https://github.com/sparkle-project/Sparkle.git
$ open .                   # Open directory in Finder to drag & drop the project file
This will check out Sparkle at the ui-separation-and-xpc immediately. Then drag the Sparkle.xcodeproj into your app project to access its build products. I usually drop sub-projects like this inside the app project’s “Framework” group.
You might want to review your build schemes in Xcode now; I hide all the Sparkle-related schemes from the drop-down by unchecking the “Show” checkbox to keep the scheme dropdown focused on my app.
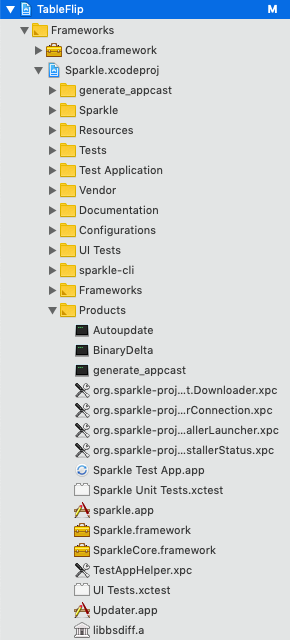
If you had a reference to Sparkle.framework in your Xcode project before, delete that. We’re going to be using the one of Sparkle.xcodeproj, which you’ll find inside its “Products” group.
If you never embedded an external framework into your app in your life: Locate the framework in the sub-project by expanding the folders/groups leading to it. Click on your app project, then on the app target in the project viewer. Select the “General” tab, scroll down to “Embedded Binaries”. Then drag and drop the Sparkle.framework from the project navigator to the left into the “Embedded Binaries” list. This will link the app with the framework and include the framework in the final app. (There’s an old video that show the old Xcode UI but is otherwise accurate.)
Migrate old Sparkle types
Ye olde SUUpdater is no more. It’s deprecated and a wrapper around the new types. It was commonly used inside Interface Builder Nibs to auto-start the updating mechanism in the background from the MainMenu.xib. For this purpose, you now will use SPUStandardUpdaterController.
The actual functionality of the SUUpdater is now put inside SPUUpdater. Yep, after a decade Sparkle now adopted three letter type prefixes in Objective-C! When things settle down, there’ll be plenty of room for NS_SWIFT_NAME pull requests.
If you used Cocoa bindings in your settings or main menu to toggle auto-updating via automaticallyChecksForUpdates, or display the date of the last update in a label via lastUpdateCheckDate, you need to rewire your bindings! SPUStandardUpdaterController is not KVO compliant for either. It does expose the checkForUpdates(_:) method that you can bind to menu items or buttons in Interface Builder, but the rest is part of SPUUpdater, not SPUStandardUpdaterController. You need to drill into the controller’s updater property which actually is of the SPUUpdater type. So the model path of the binding changes from e.g. self.automaticallyChecksForUpdates to self.updater.automaticallyChecksForUpdates. Adjust the other paths similarly.
With these changes in place, you should be ready to roll!
Changes to the object lifecycles in Sparkle
Note that SPUUpdater, unlike the old SUUpdater, does not cache instances! Previously, you could just call the default initializer anywhere inside the same app bundle and get the same object. It was like a singleton in that regard. But now the SPUUpdater has no such mechanism. Neither has SPUStandardUpdaterController.
You are allowed to instantiate multiple SPUStandardUpdaterController objects in different Nib files. It is sufficiently safe to do so. They don’t perform any black magic: all they do is set up the updater object and start the update process. There should be no trouble having multiple instances in memory – but I haven’t checked this, because I don’t find this use case particularly interesting. I only use the controller object inside of preference windows and so far haven’t experienced any clashes or duplicate update requests.
Conclusion
If you customize your update process a lot – and this 2.0 preparation fork of Sparkle allows a ton of customization, including custom updater UI! –, then you will likely want to keep a shared/global/Singleton updater object around, because it is tied to a SPUUpdaterDelegate, and maybe even to one of the “driver delegates” that are notified about download progress. Indeed I set this up once in my AppDelegate and then save this as a variable that I can access from anywhere else in the app. (Call it Singleton, call it a global variable, call it a static property – it’s the same mechanism.) I essentially replicate the shared object model of the old Sparkle framework version in my own code.
In fact, I’ll be using this more heavily in the WordCounter app. I’m splitting the WordCounter into multiple helper apps at the moment, and I want all helper and XPC apps to use shared preferences to determine if updates are to be fetched using the “beta update” or the “stable update” feed. These kind of customizations work well with SPUUpdaterDelegate, but I need to use it everywhere and make sure that no Nib creates a default controller and default updater with the default settings. All this is less convenient, but only a little bit.
Sparkle’s ui-separation-and-xpc branch works fine out-of-the-box, and is still super simple to integrate!
The new customization options make it very flexible. The migration docs are not very instructive, but I’ll keep you posted on updates. Meanwhile, the Objective-C header files provide a lot of essential information:
/*!
 A controller class that instantiates a SPUUpdater and
 allows binding UI to it.

 This class can be instantiated in a nib or created using
 initWithUpdaterDelegate:userDriverDelegate:. The
 controller's updater targets the application's main bundle
 and uses Sparkle's standard user interface. Typically, this
 class is used by sticking it as a custom NSObject subclass
 in an Interface Builder nib (probably in MainMenu).

 The controller creates an SPUUpdater instance and allows
 hooking up the check for updates action and menu item
 validation. It also allows hooking up the updater's and
 user driver's delegates.

 This controller class may not be valuable to you if:

 * You want to control or defer the instantiation of an
   SPUUpdater, or don't want to be tied into a nib's
   instantiation, or don't want to use a nib
 * You want to target a bundle that's not the main bundle
 * You want to provide a custom user interface, or perhaps
   one that provides little-to-none
 * You don't want to use a convenience class that provides
   very little glue ;)

  */
@interface SPUStandardUpdaterController : NSObject
/*!
 The main API in Sparkle for controlling the update mechanism.

 This class is used to configure the update parameters as well as manually
 and automatically schedule and control checks for updates.
 */
SU_EXPORT @interface SPUUpdater : NSObject

/*!
 Initializes a new SPUUpdater instance

 This does not start the updater. To start it,
 see -[SPUUpdater startUpdater:]

 Note that this is a normal initializer and doesn't implement
 the singleton pattern (i.e, instances aren't cached,
 so no surprises).

 This also means that updater instances can be deallocated,
 and that they will be torn down properly.

 Related: See SPUStandardUpdaterController which wraps a
 SPUUpdater instance and is suitable for instantiating in nib files

 @param hostBundle The bundle that should be targetted for updating. This must not be nil.
 @param applicationBundle The application bundle that should be relaunched and waited for termination. Usually this can be the same as hostBundle. This may differ when updating a plug-in or other non-application bundle.
 @param userDriver The user driver that Sparkle uses for user update interaction
 @param delegate The delegate for SPUUpdater. This may be nil.
 */
- (instancetype)initWithHostBundle:(NSBundle *)hostBundle
                 applicationBundle:(NSBundle *)applicationBundle
                        userDriver:(id <SPUUserDriver>)userDriver
                          delegate:(id<SPUUpdaterDelegate> _Nullable)delegate;