Colorize Onyx BOOX Notes Vector PDFs (Really Rough Edition)
Sacha Chua has this nice Python script to colorize her SuperNotes sketches. Can’t be that hard to apply color replacement to the notes from BOOX devices, can it?!?!
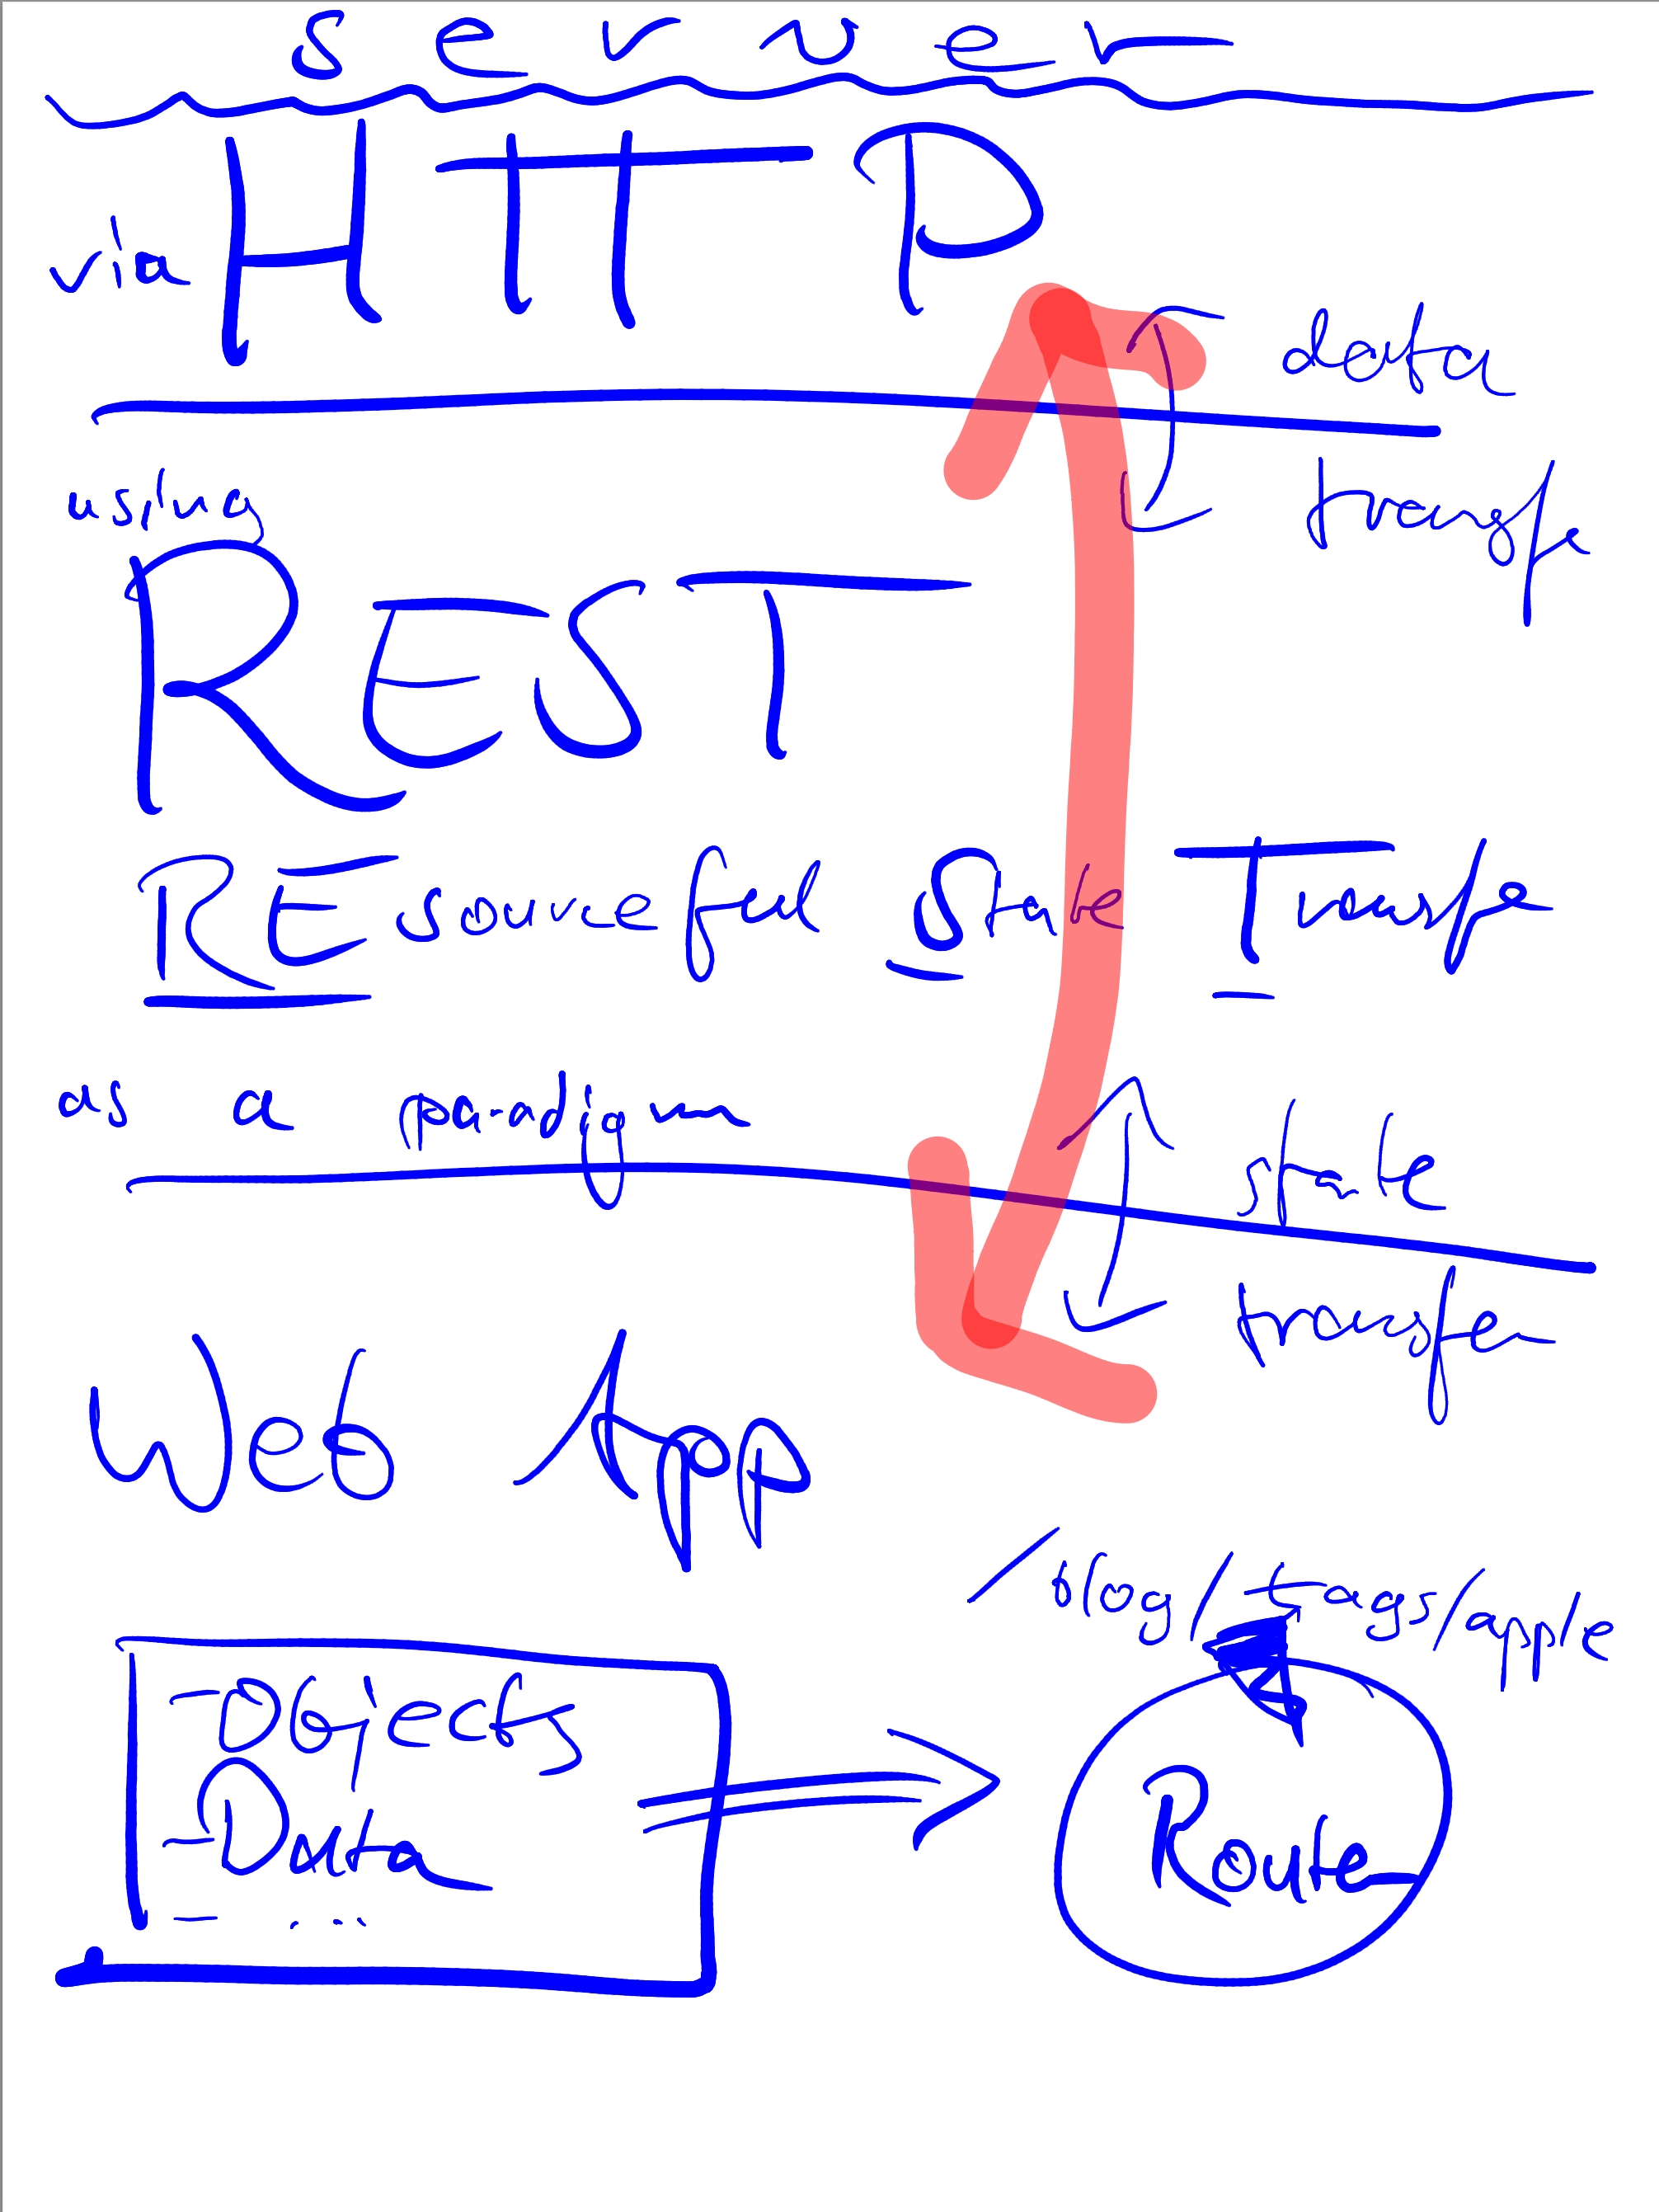
The example note
I had this exported vector PDF lying around:
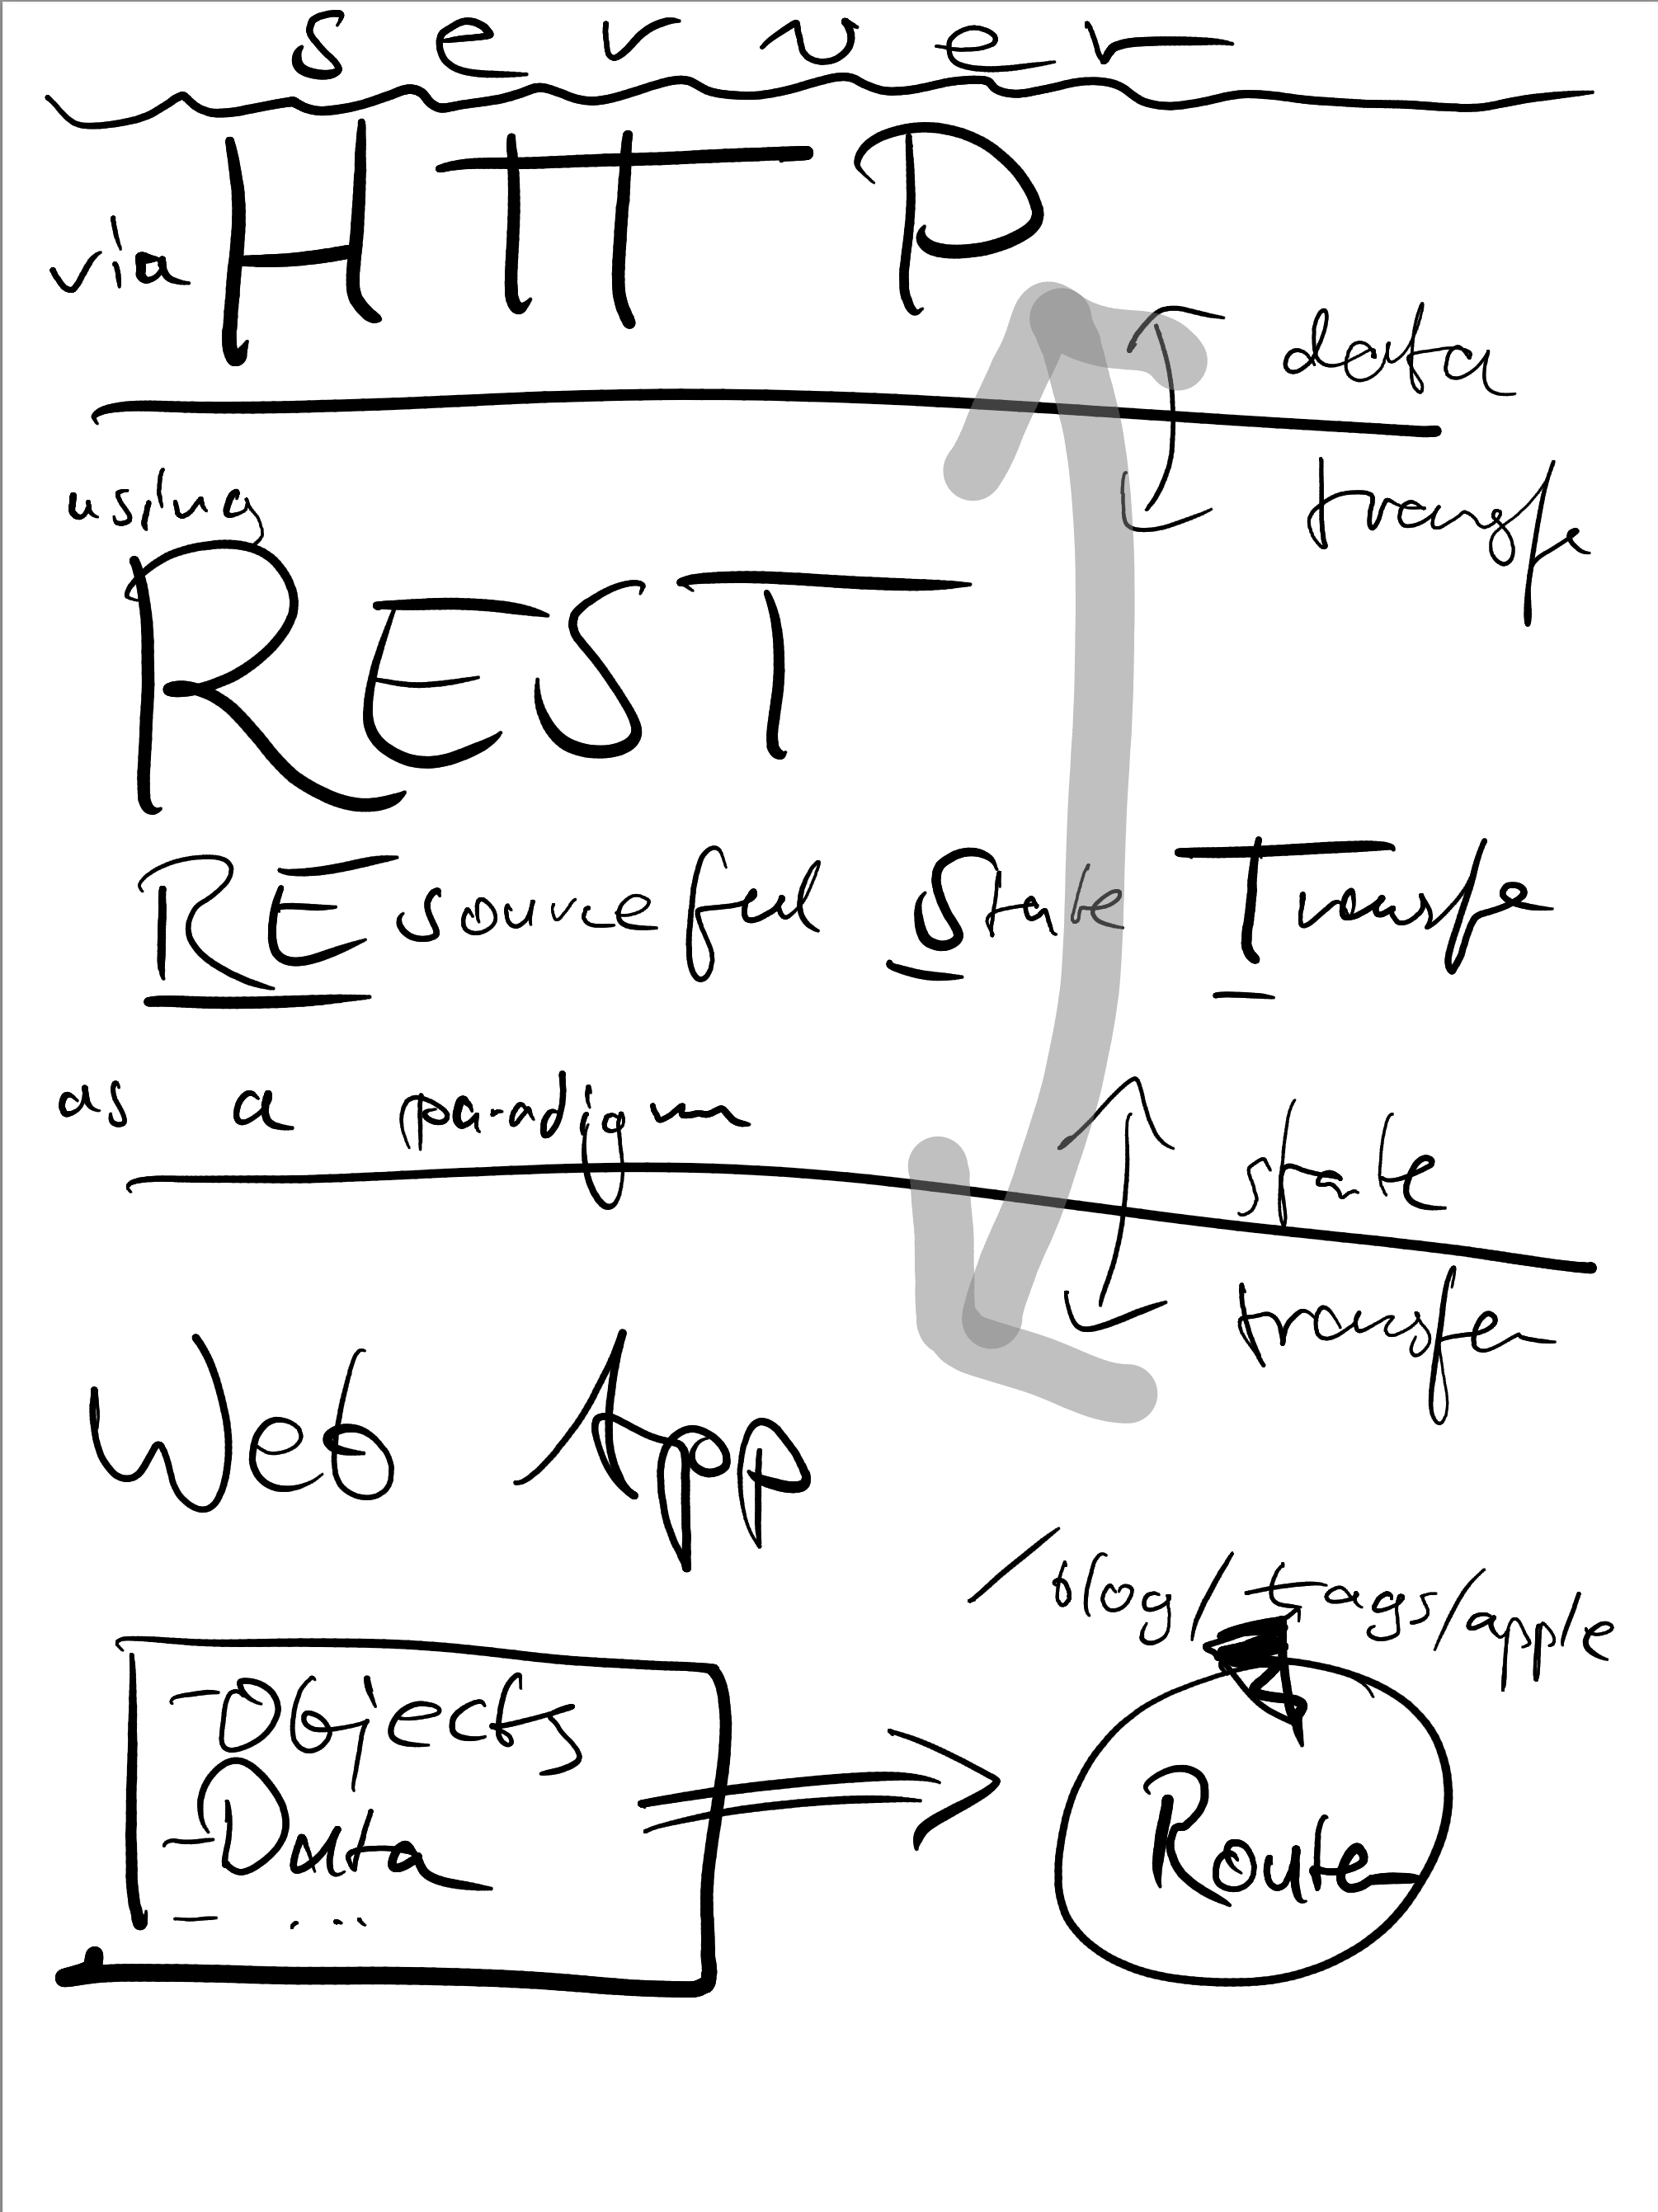
A single page, two brush colors. Ideal testing ground.
If you’re interested, you can download the original PDF here.
Failure: Replace colors in rasterized image
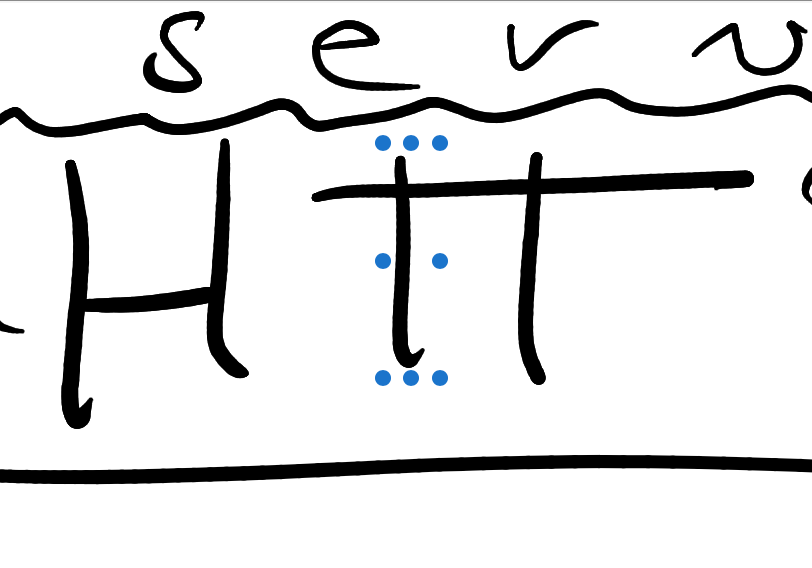
Opposed to Sacha’s sketches, the BOOX Notes app can produce vector PDFs (which I used here) instead of rasterized images. Converting the PDFs to rasterized image produces smooth edges. Her notes have pixelated, hard edges that are easier to color match.
That’s not a great start to perform color-based replacements!
My color picker tells me the mid-tone gray is ~0.52 grayscale, or #858585 hex RGB. And black is black.
Digging through a couple of StackOverflow answers, I found that ImageMagick can perform color replacements with fuzzy input color matching, which sounded ideal for the antialiasing everywhere:
$ magick grayscale.png \
    -colorspace sRGB -type truecolor \
    -fuzz 5% -fill blue -opaque "#858585" \
    -fuzz 10% -fill red -opaque black \
    colorized.png
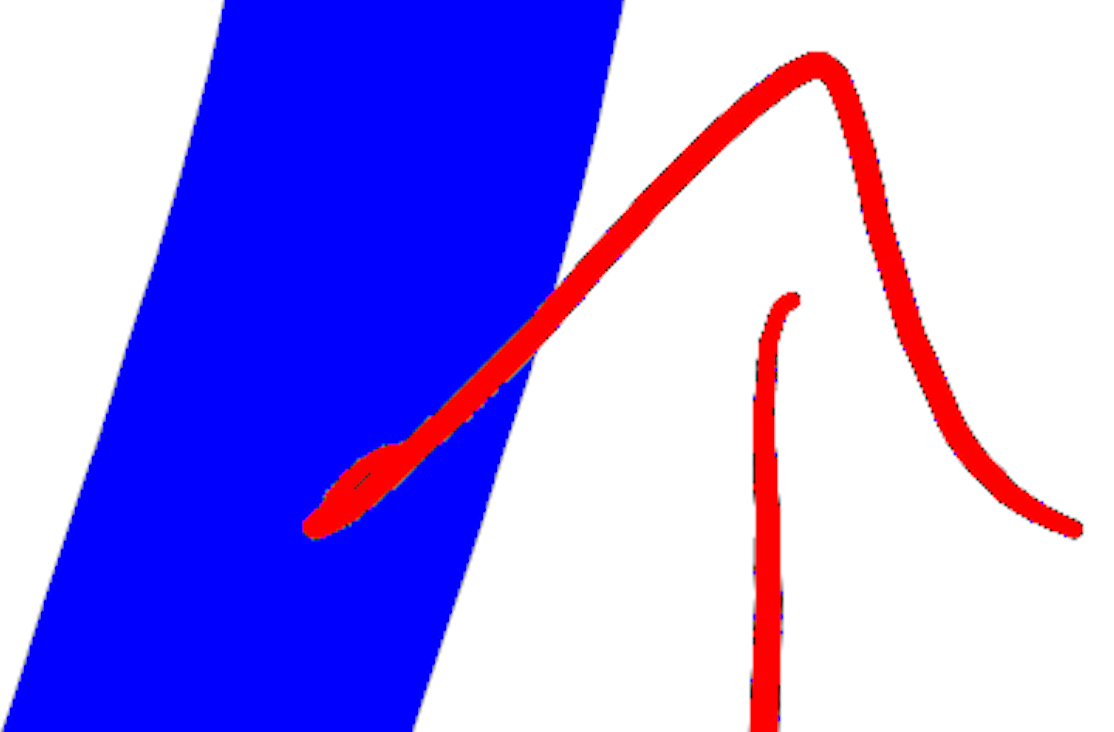
The result isn’t that good-looking. Fuzzy matching on tonal value alone is hard because a gray fading into the background color is similar to a black fading into the background color in some places.
ImageMagick would be a great choice to colorize a monochrome picture with one other color, or a color gradient: then you could match the tonal values from 0.0 (black) to 1.0 (white) to positions on that gradient using the +level_colors operation.
Success: Replacing vector shape colors in the PDF
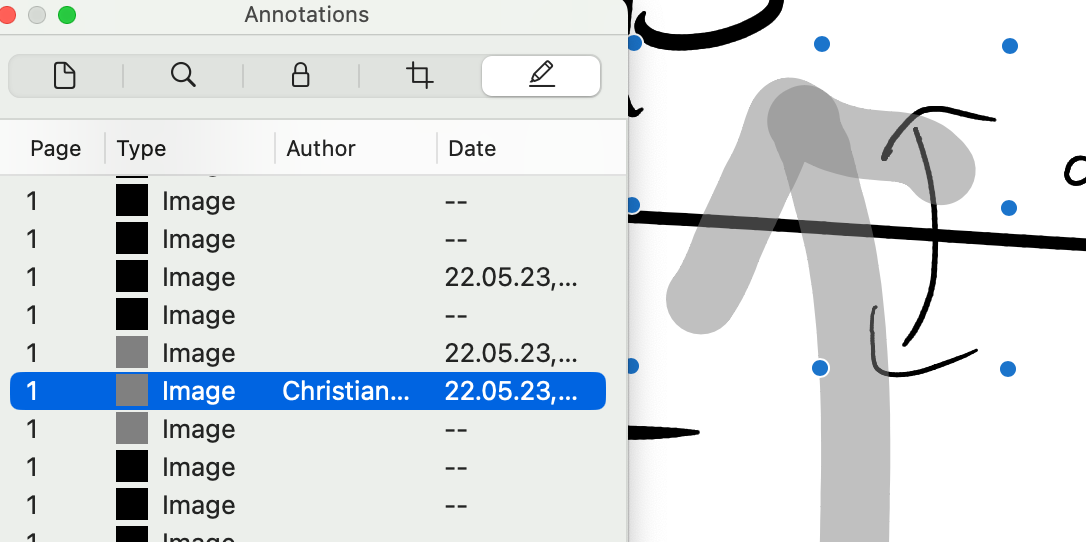
I noticed in Preview that I could select brush strokes, so they weren’t baked into the PDF “flatly”.
It took me a while to figure out how to treat these “sub-images”, or “embedded images”, or whatever they were. Preview’s inspector revealed that they are annotations, and that the fill color is stored in the PDF somehow.
Annotations can be added and edited by the user, too; but Preview wouldn’t let me change the color of these annotations. Popular open source PDF annotation tool Skim doesn’t show any of these shapes as annotations at all. Affinity Designer 2 doesn’t recognize these, either. I then sent them to my fiancée: Adobe Illustrator on Windows also doesn’t recognize any of these, but looking at the PDF in Thunderbird reveals the strokes animated. Stroke by stroke. That looked pretty cool. To be frank, I suspect this was merely incrementally rendering all the strokes using a slow engine. Still, nice effect! I didn’t find any obvious timing information that control this, so exporting video from this is a task for another day.
Next, I did the only sensible thing to inspect PDFs: open the file in a text editor.
Editing PDFs in Emacs
In doc-viewer-mode, which renders PDFs, press C-c C-c to edit the PDF’s source code. (Ok, Emacs is not necessary; TextMate would be just as fine to display the contents.)
Looking through the syntax that was not binary garbage, I looked for a repeating pattern that might be the annotation object syntax. There, I eventually found a string of numbers next to the letter “C”, 0 0 0 , and that looked suspiciously like a color triplet for “black”. Scanning further down, I found 0.501961 0.501961 0.501961, which surely was the mid-tone gray color!
Replacing these instances and then saving the result broke the PDF. So to edit the PDF file, one needs to uncompress it and then perform replacements.
$ brew install pdftk-java
$ pdftk orig.pdf output uncompressed.pdf uncompress
That blew a 700 KiB PDF up to 12 MiB.
Searching for 0 0 0 to indicate “black”, I found a lot of previously compressed object streams that started like this:
/GS gs
0 0 0 RG
1 j 1 J
2.02625 w 376.49 1730.42 m 375.853 1730.42 l S
2.10902 w 375.853 1730.42 m 375.215 1730.42 l S
...
“GS”?
GhostScript?
Chapter 4 (“Graphics”) of the GhostScript reference (PDF) says:
The
CSandSCoperators select the current stroking color space and current stroking color separately;RGsets them in combination.
So this sets the color space “DeviceRGB” and the stroke color “black”. (This also teaches us that these are strokes with varying line widths, not filled forms. The lines that follow remind me of SVG and could well be path “move” commands at a certain width with a stroke action.)
Replacing 0 0 0 RG with 0 0 1 RG and CS 0 0 0 to CS 0 0 1 was simple enough to change everything to “blue”. (I don’t yet understand why >90% of the strokes use the 0 0 0 RG format, but a handful has CS 0 0 0 or the color array \C [0 0 0] form.) Anyway, replacing these occurrences in the uncompressed state did the trick.
On this journey, I also found a Python script to replace annotation colors using Regex. And a Python 2 version. Both replace any color with one single color value. I want to perform a mapping, so a simple string replacement is currently the easiest option. (Until I write a script in the next installment, of course!)
To save space, compress the result:
$ pdftk uncompressed.pdf output recompressed.pdf compress
This is actually 100 KiB smaller than the original. Nice.
Result
Replacing the color data in the
This looks excellent! I don’t want to keep these colors, but as a tech demo, that’s great.
The mid-tone gray stroke was implemented somewhat translucent, and this still shows through in the re-colored output where the arrow pieces overlap. Ideally, I want flat, non-transparent colors for these.
Or maybe I don’t? If I remember correctly, I used the text marker tool, which should probably continue to render in a see-through manner.
I don’t understand half of the PDF’s “source code”, so I’ll be digging into that a bit more in the future to avoid making stupid mistakes with my PDFs. I do know now that I’m not interested in writing a PDF renderer from scratch, though!
Up next: automating this to color-match the non-black strokes. The BOOX Notes app has e.g. a “yellow” stroke, which I can’t see because it’s a greyscale device, but matching these named colors to real, well, colors would be nice.
Update 2023-05-25: Turned out that I was right and that the color names like “navy blue” or “yellow” are exported as colors. So use these!
If you want to check out these PDFs in your own text editor, here they are: